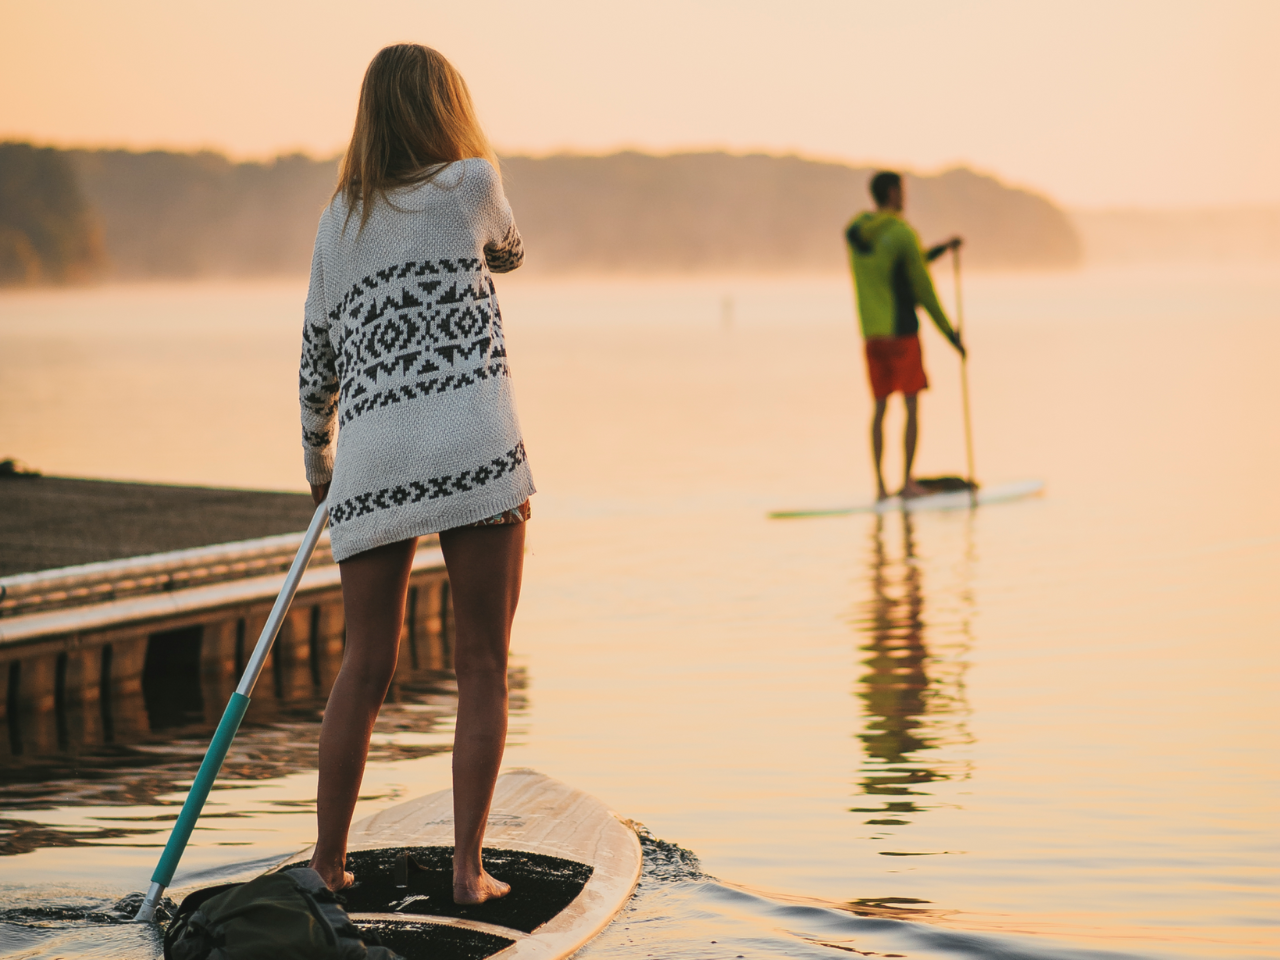
Everything You Need to Know About Building a Wood Paddle Board
Getting Started
Do you want to build your own customized wooden paddle board? Making your own paddle board is fun, exciting, and gives you a well made watercraft that can be used for generations. If you love to build your own stuff, this is one of the most unusual woodworking projects—we’re sure you’ll love it!
You can also consider using our wood paddle board kit to help you through the process. Below, we’ll break down everything that you need to know. Let's get started with how it works:
Assemble the Paddle Board Frame
First, you’ll need to assemble the internal Frame structure. Purchasing our laser-cut Frame is by far the easiest way to see your board start to take shape. However, you can also build them on your own. We offer digital or paper Plans that you can use as a template, allowing you to build the board completely from scratch.
Make sure that you have a large, flat surface to work on. You’ll want to make sure you have enough space for the entire ribbing section to sit out. A one car garage is pretty much the bare minimum space needed to build comfortably.
You should have several Frame pieces, which build your inner ribs. You’ll need to join the pieces using a wood adhesive and scrap wood with a clamp, then allow them enough time to cure. This process should make the parts extremely strong. You’ll need to go down the entire frame with this process.
Add the Wood Paddle Board Skins
Once you have the Frame assembled, you can then add the "skins," or the outer wood that you will ultimately see and stand on. We recommend using the Strip Method, adding 1/4" thick x about 1-2" wide strips of lumber to your Frame. We always recommend sourcing your lumber locally but if that is not an option, you can visit your local big box hardware store or buy some pre-milled lumber from us.
Find the center of your board, then run your glue the entire way down. You’ll start adding the strips from the inside area, moving to the outer areas of the board. You don’t want to start at the ends, although you can add two strips at one time. Use this process for the top and bottom of the board.
As a tip, twisted cling wrap is strong enough to hold the strips securely to the hollow core wood. It also reduces the amount of clamps you need. Plus, you don’t need to worry if your board doesn’t look perfect—you’ll be sanding down everything nicely at the end of the project. So, you can ignore glue drips for right now.
Add the Nose and Tail Blocks

Now, it’s time to shape your wood board! You’ll need to add the nose and tail blocks, and shape the board. Make sure you start with the tail end, you can use any type of wood, as long as it’s light weight.
You’ll use a handsaw at the end, around two inches across. You’ll want your tail piece to be the same size as what you remove. Then, when it’s cut, make sure to sand everything down to a smoother texture. Compressed air removes any debris.
From there, connect the tail block using an adhesive and clamps. You won’t want to touch it until it’s completely cured.
For the nose, you follow the same steps. Although, it could be different, depending on what type of nose tip you want on the end of your board. Having one or two blocks can give the nose a different shape. Measure out from the center block, to where you want the center blocks to go on the board. Then, cut it again and repeat the previous process.
When these parts are attached and cured, you get to start shaping! Many woodworkers enjoy this upcoming step the most.
Shaping Your Wooden Paddle Board
You’ll need to sand the board down from one end to the other. That way, there’s no warping or dips along the board. No matter the tool you use, you need to always go from tail to nose in a straight line. Then, always remove the same amount of wood from both sides.
Finally, make sure that you always stop and look at the board. You want to do this as often as possible. That way, you know it’s taking the proper shape. Overall, there’s no right way to go through this process—everyone sands differently.
Add the Fin Box
You’ll need to add a few plastic parts to the board like a leash plug, a handle, and, most importantly, a vent (to avoid expansion & bulging). You can use this method to add mounting areas to the paddle board. We have everything you need on our site to help you through this step. It’s your DIY paddle board, so make sure to add anything you want!
Fiberglassing a Wood Surfboard
Finally, you’ll need your paddle board to be waterproof! This involves laminating the board using fiberglass cloth and epoxy resin. This process gives your board an entirely new, shiny appearance.
You’ll need to make sure you wear gloves and a mask or respirator when working with the epoxy. Mix the two-part epoxy and stir. Pour the materials on the wood, then spread it evenly with a plastic spreader squeegee. You’ll also want to make sure the epoxy you use offers a good working time. There are many different brands of epoxy to choose from and after many boards built in our studio, we've opted for Resin Research.
Final Thoughts
Overall, doing a DIY paddle board project is a lot of fun and is very rewarding. These woodworking projects are perfect for building your skills and learning a new craft. Plus, when you’re done, you’ll have something awesome to show for it! Check out our shop and browse our Plans or Frame Kits to get started and contact us is you need any help choosing your materials or technical support during your build.
Thank you for you business!
